Just because it's winter doesn't mean you have to hang up your tool belt. You can keep the DIY going with winter home improvement projects. Do these without propping open doors or freezing your fingers off setting up shop in the garage.
Let the indoor work begin with these seven value-adding projects:
#1 Update Your Laundry Room
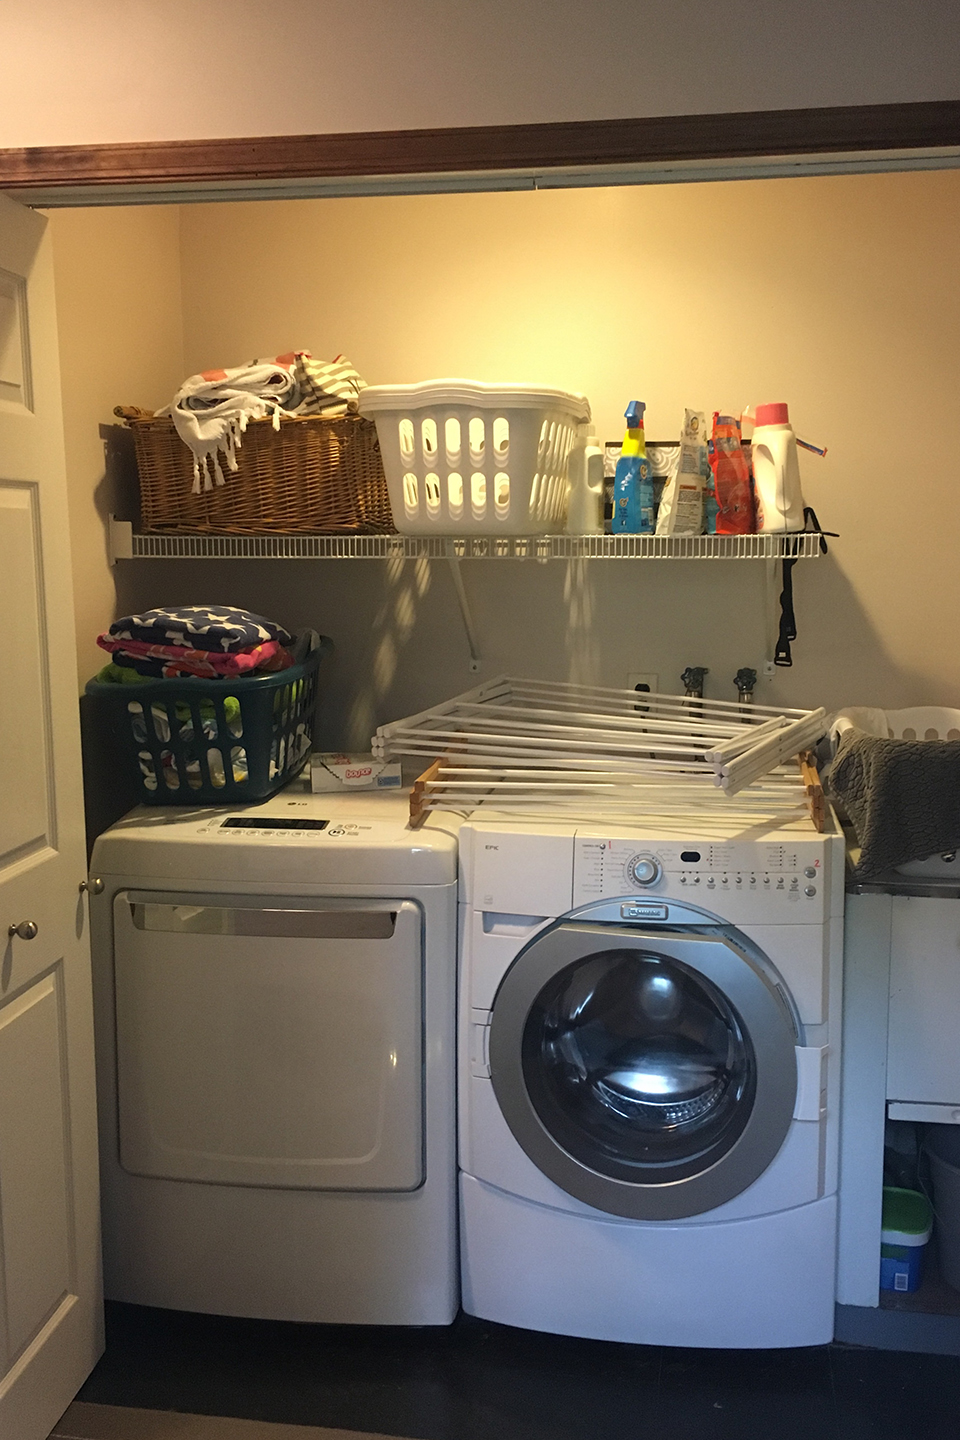
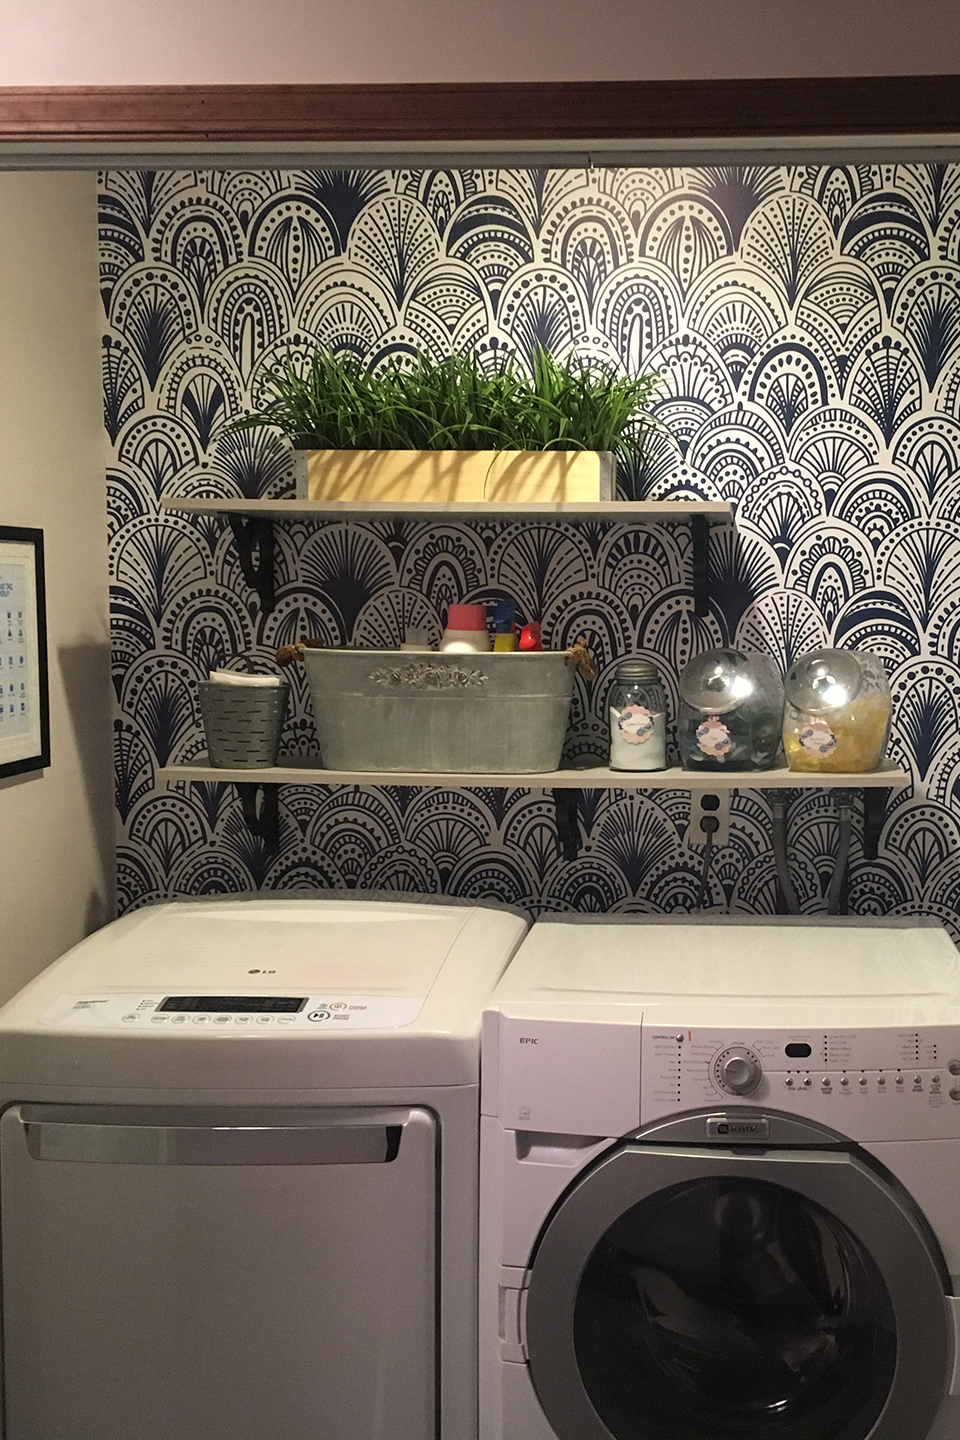
Laundry rooms in need of an upgrade tend to suffer from a lack of features, so this is typically a sledgehammer-free project. That means no windows propped open on a seven-degree day to let out dust.
To make a bleak laundry space more functional, add shelves and bins for laundry baskets and detergent, and put a countertop over the washer and dryer. You get storage space and a place to fold clothes. Add a little peel-and-stick wallpaper, and you can make the chore-heavy room more enjoyable without fumigating your cozy home with paint.
Pro Tip: Appliances go on sale September through November and in January. You can snag a deal for your winter home improvement project if you time it right.
#2 Add Crown Molding
Crown molding adds some heavy-duty appeal to a home without any heavy materials to haul through the ice and snow. You can put it at the top of walls or door frames or on the wall along the top of cabinets.
It's not just pretty. Crown molding will cover dings and nicks on walls, and it gives your home a custom look buyers love. You won't be using a ton of paint on molding, so fumes won't be an issue, either.
You can do this winter home improvement project — painting, prep, and installation — in a weekend with a miter saw, drop cloth, paint, nail gun, and a ladder. For professional results, be sure to pick the right size. Crown molding ranges in width from three inches to 20 inches, so choose one that's in proportion to your ceiling height:
- For standard eight-foot ceilings, the molding should be two-and-a-half inches to six inches wide.
- For nine-foot ceilings, three inches to seven-and-a-half inches wide.
- For 10-foot or higher ceilings, at least eight inches wide.
Related: 10 Crown Molding Ideas
#3 Change Out Cabinet Hardware

Here's a simple upgrade you can practically do with hot cocoa in one hand: replacing the old pulls and handles on cabinets with
If you inherited minimalist cabinets with no pulls at all, you're adding function, too. "It's simple and will have a dramatic effect on a room," says Kathryn Emery, a home improvement and lifestyle expert with an eponymous YouTube channel.
A hardware redo is one of the simplest winter home projects because all you need is a screwdriver and an hour or two.
#4 Get a New Faucet

A faucet is the brains of your sink. Put a better one in, and your sink is suddenly smarter. Normally, plumbing projects are near the top of the list of "Don't Try This At Home" ideas. But this one is an easy one — as long as you get a faucet with the same number of mounting holes in your sink.
Just turn off the water shutoff valves under the sink and follow the instructions that come with the faucet. If you can assemble an IKEA bookshelf, you can install a faucet. Really.
#5 Put in a New Bathroom Vanity

Take your bathroom into the 21st century with a new vanity. You can pull out your old one without making clouds of dust, and that's a single, prefab unit you won't have to paint. No fumes, no dust, no problem for a winter home project.
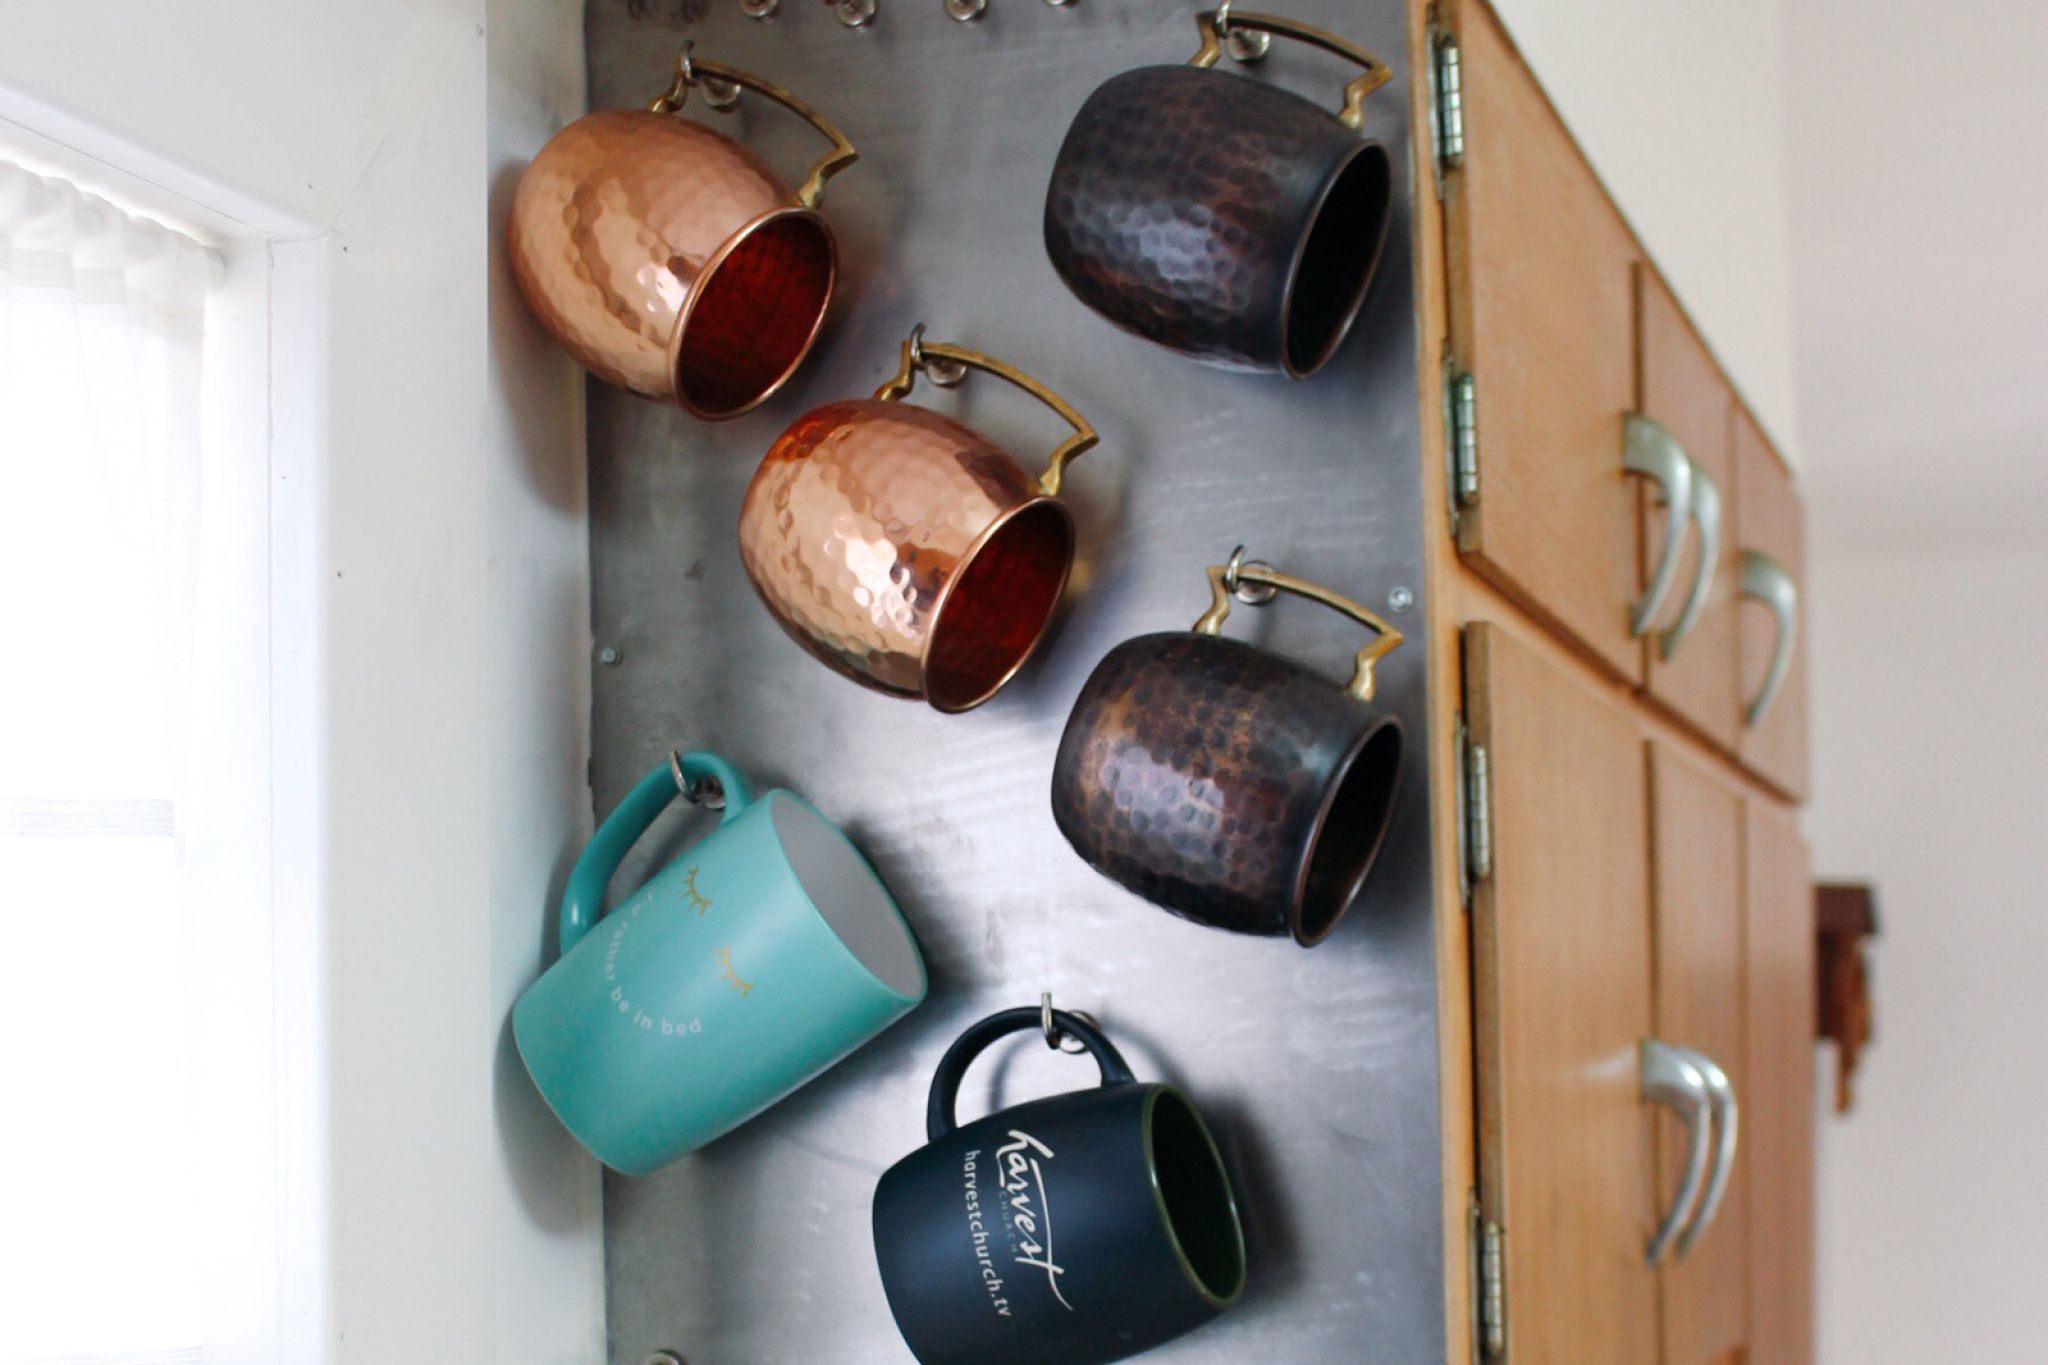
#6 Max Out Your Kitchen Storage

Turn a kitchen wall into a storage wall by covering it in easy-to-install pegboard, then hanging pots, pans, cutting boards, and other utensils on it. You can find pegboard in a variety of colors and styles, so you can skip the fume-producing painting step.
Plus, it adds storage space without losing any square footage. Add a shelf at the top of that pegboard wall and you'll have storage on steroids.
Another genius hack: Add storage in the wall with between-the-studs shelves. You get more space for your stuff and more value, because home buyers love-love-love space for stuff.
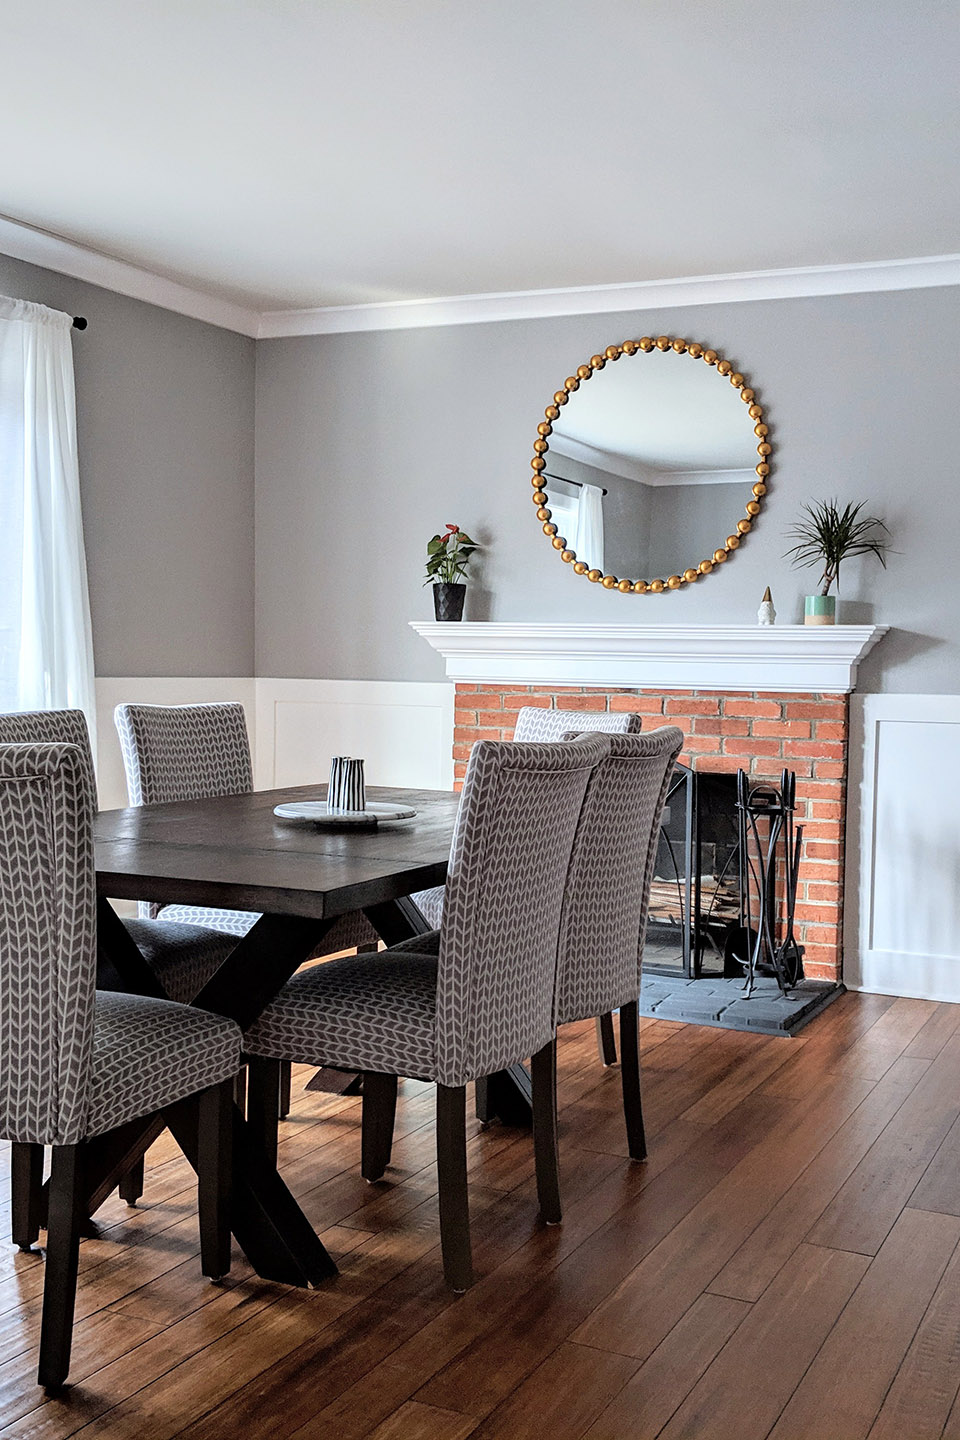
#7 Add Wainscoting

Pump up the panache in your house by adding wainscoting to walls. "It's like icing on a cake, because it creates a finished look," Emery says.
It's pretty easy to do, too. It comes in panels you can put on the wall in one piece (even prepainted to avoid the fumes), and you don't need mad carpentry skills to install it.
Just take off your baseboards. Cut each panel of wainscoting to length. Glue it in place with construction adhesive, and nail the panels where the studs are. Glue on the cap rail and put the baseboard back. You can do wainscoting in an average-sized room in two to four hours, including breaks for hot chocolate.
Related: 12 Delightful Ways to Increase Natural Light Indoors During Winter