If your bathroom needs an update, but you don’t want to overhaul the entire space with a remodel, it may be time to refinish your bathtub. Refinishing could make the room look fresher and more modern. You could tackle this project yourself with some guidance or hire a professional for a higher cost.
Here are some tips to help you decide whether refinishing your bathtub is right for you and how to choose between DIY and bringing in a pro. Either way, once the project is done, just add bubbles and relax.
What's the Difference Between Bathtub Refinishing, Resurfacing, and Reglazing?
Some people use terms like bathtub refinishing, resurfacing, and reglazing interchangeably. However, each term has a distinct meaning.
- Bathtub refinishing covers superficial damage, like chips and scratches, by replacing the old finish. Resurfacing and reglazing are both part of that process.
- Bathtub resurfacing refers to correcting the tub’s surface by filling in scratches and buffing down inconsistencies.
- Bathtub reglazing refers to one of the final steps: adding a protective coating over the tub surface.
When to Refinish Your Bathtub
If your bathroom needs a new look, refinishing your bathtub could go a long way. It could bring some shine back to help a worn bathtub look new. Consider reglazing every few years or when it starts to look shabby. The second coat or layer of the reglazing material should last three to five years, according to Fixr.
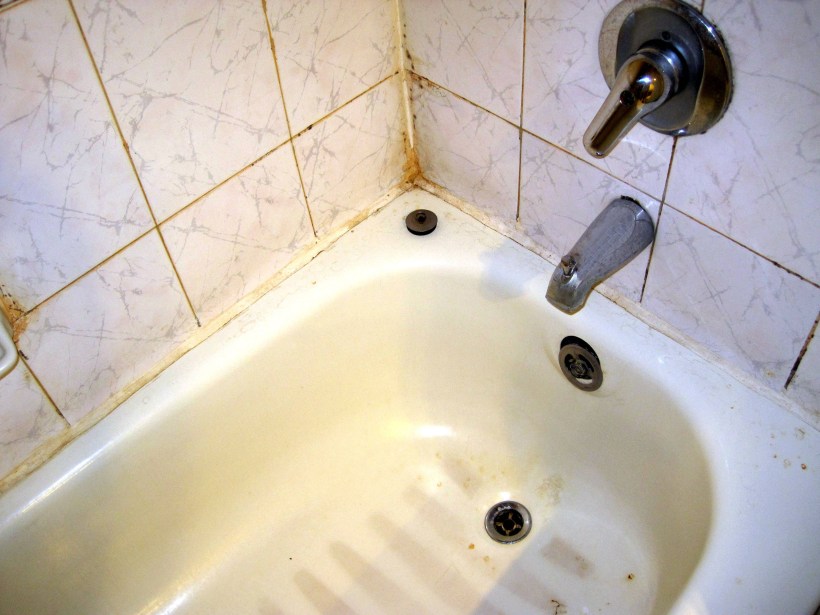
Some signs that it’s time to refinish your bathtub include:
- Chipping and scratching along the bathtub’s floor
- Worn-down, dull finishing
- Faded or warped paint
- Difficulty cleaning grime from the tub’s surfaces
Refinishing isn’t always the best option for a worn-out bathtub. If a tub has severe damage, like big cracks or holes, rotting, or rust, you might want to bring in the pros to swap it for a new one.
Of course, you may want to refinish the tub, not because it’s worn out, but because you want to change the color to match your bathroom’s aesthetic. Paint will help personalize the look with a new color, but the paint can chip away and might require repainting in the future.
Is It Worth It to Refinish a Bathtub?
Refinishing a bathtub could give your bathroom a serious facelift, but it’s not always the right intervention. Replacing a tub is more expensive and labor-intensive than refinishing. But sometimes, replacement is the best option.
To determine whether refinishing your tub is worthwhile, consider the following:
- Age. Counterintuitively, an older tub might be a better candidate for refinishing than a newer tub. Older tubs tend to be more durable and long-lasting. With a fresh finish, you could extend its life by 10 to 15 years. But most tubs can tolerate refinishing only twice.
- Cost. This is perhaps the most apparent reason to refinish a tub instead of replacing it. Refinishing could cost hundreds of dollars less than replacing.
- Condition. A tub with some scratches, chips, and wear usually needs a little attention in the form of refinishing. But a bathtub with substantial damage may call for more than a makeover. If your tub has cracks or missing tile, but you don’t want to replace it, you may consider installing a tub liner instead.
- Future plans. If you plan on remodeling your bathroom in the next few years, or even if you’re just unhappy with the layout, you may not want to refinish your bathtub. It likely isn’t worth the effort if you’ll eventually have to replace your tub anyway.
Bathtub Refinishing Materials
To DIY your bathtub refinish, you’ll need a different set of supplies than the pros. Many home improvement retailers sell DIY bathtub refinishing kits, which may reduce some of your shopping. Those kits usually include epoxy, epoxy hardener, various brushes and sprayers, and polish or paint. Whether you use a kit or not, you should have the following supplies before you begin:
| Safety Equipment | Prep Equipment | Cleaning Products | Materials to Fill in Dents and Scratches | Sanding/Buffing Tools | Bathtub Refinishing Tools |
| - Gloves - Goggles - A fan for ventilation - Long sleeves | - Tape to section off the area - Drop cloths to keep the area clean - Rags to wipe up spills | - Bleach or an abrasive cleaner like Comet - Sponges and rags | - Epoxy, which may come in your DIY kit, or bathroom putty - A sponge brush or sprayer to apply epoxy | - A manual or palm sander, steel wool, or sandpaper - Rags to wipe up dust | - Paint or glaze - Roller or brush - Small brushes for touch-ups |
Bathtub Refinishing: Step by Step
Before you dive into this project, check out the basic steps. That way, you can decide whether you feel comfortable DIYing or should go with a professional. This is a general guide for bathtub refinishing. So, if you choose to DIY the project, look for more detailed instructions.
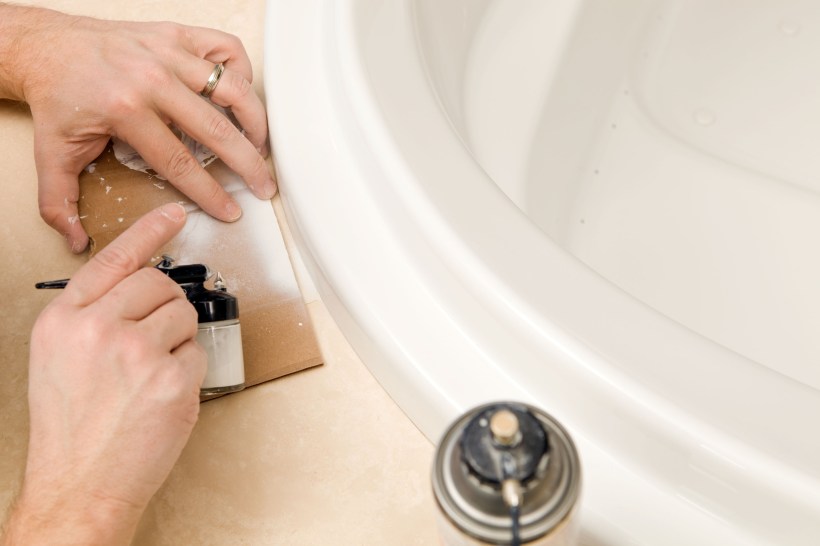
#1 Prep the Space Before Resurfacing the Tub
Begin by ensuring the space has adequate ventilation. Use an exhaust fan to remove toxic fumes and open windows and doors or use an industrial or portable fan to circulate and replace the air for up to two days while the product dries. This step is critical to your health and safety, as you’ll work with hazardous materials. Next, remove clutter, protect your fixtures, lay down your tarp, tape off the area, and collect all the necessary supplies.
#2 Clean the Bathtub
Before you do anything more, you have to scrub. Deep clean the tub to remove every trace of soap scum, mold, dirt, and other debris. The cleaner the tub, the better the coating product can adhere to the surface. If your bathroom is easy to clean, this step may not take as long.
#3 Fill Bathtub Dings and Scratches
Use epoxy or putty products designed for bathrooms to fill in gashes, dings, holes, and scratches in your tub. You may want to speak with a professional if the tub needs more than cosmetic care. Sand down textured or inconsistent bathtub surfaces before proceeding.
#4 Buff the Bathtub
Thoroughly buff out the whole tub to strip its topmost layer, using a sanding machine, sandpaper, steel wool, or other buffing tool. This step removes the peeling remnants of the last coating and helps even out the tub’s surface.
#5 Clean and Buff the Bathtub (Again!)
You’ll repeat the cleaning and buffing process a few times. Since the sanding process releases dust particles, you must clean the tub thoroughly each time you buff. If any dust remains, your finishing product may not adhere.
#6 Apply Bathtub Refinishing Product
Wearing a mask, gloves, and goggles, and working in a well-ventilated space, apply the coating product with a brush or spray. DIY kits likely include this product, but otherwise, you’ll have to pick it up separately. You may have to use a few layers. Let the product dry completely. Consult product instructions for details on the time to dry.
#7 Clean the Bathtub (Yes, Again!)
Once the product is thoroughly dry, you can clean the space, remove the tape, and rinse your tub to remove any lingering chemicals or dust. If you need to reapply caulk or grout, wait until the tub has completely dried.
#8 Regularly Maintain Your Bathtub
Regular bathtub maintenance could help your new finish last longer and look better. To maintain your tub, try to clean it after every use. That may sound daunting, but the more often you clean, the less time and effort it takes. Ensure you have bathroom ventilation to avoid excess moisture that may lead to mold. Refer to the instructions on your DIY kit or refinishing product for how to best preserve the coating.
How Long Does It Take to Refinish a Bathtub?
Factors like humidity and your bathtub’s materials and age could affect how long refinishing takes. Generally, the refinishing process takes two to five hours. Professionals may complete the project more quickly, and first-time DIYers may take a little longer. But don’t grab the bubbles yet. Before you can enjoy a luxurious bath in your newly refinished tub or soon-to-be spa-like bathroom, you must let the tub dry. This could take up to 48 hours but may need only 24 hours.
DIY Bathtub Refinishing
Whether you hope to save money or are ready for a new project, you may want to DIY your bathtub refinishing instead of hiring a professional. Fortunately, you can, though the process may include a few messy steps. Consider the following to help you get started.
Bathtub DIY Kits
Many retailers sell DIY kits that make refinishing the bathtub a more straightforward process. The kits include materials like epoxies, putties, or enamels that work with the most common types of bathtubs. They may also come with brushes, sprayers, rollers, and sandpaper. Some even include specific tints to change the color of your bathtub.
The Safety of a DIY Bathtub Refinish
While you must take safety precautions, the bathtub refinishing process is relatively uncomplicated. The most strenuous work is cleaning and sanding down the tub a few times. Make sure you take breaks as needed and stay hydrated.
Sanding the tub and applying products like epoxy release dust particles and hazardous chemical fumes. Protecting your lungs and skin throughout the process is paramount to your safety. Wearing gear like an N95 mask, gloves, goggles, long sleeves, and long pants could go a long way in keeping you safe.
Ventilation is essential for your lungs and for allowing the space to dry. Keep a fan on and, whenever possible, open your windows to maximize airflow in the area.
Quality of Results
DIY bathroom refinishing may save you money, but it’s unlikely to bring you the same quality results a professional would get. A pro may achieve a smoother finish or a higher shine. However, a DIY tub refinish could still look great, even if it doesn’t quite reach professional standards.
Professional Bathtub Refinishing
If you don’t want to DIY your bathtub refinish, you could always bring in a pro. Contractors’ typical process for refinishing a bathtub is similar to the DIY process. They start by deep cleaning the tub. Then, they remove the existing finish and repair any cosmetic problems. Finally, they spray on a finish for uniform coverage in the color of your choosing. While they follow the same basic steps as DIYers, with experience on their side, they often have smoother and more seamless results.
Why Do Professionals Get Different Results?
While DIY bathtub refinishing kits and home improvement stores could certainly offer you the refinishing tools it takes to get the job done, professionals have access to more specialized technology. Higher quality tools plus expertise mean contractors often leave you with more polished results that last longer.
Cost to Refinish Bathtubs
If you hire a professional, your tub’s materials and size may impact the price. Fiberglass is at the low end of the cost spectrum, with prices ranging from $250 to $600, according to a Fixr cost comparison. On the other hand, an acrylic tub could cost $400 to $700. These estimates include labor and materials. If you DIY the project, you could expect to spend around $75 on supplies, according to the Homewyse cost calculator. (Depending on where you live, your costs may be slightly higher or lower.)
For comparison, a basic replacement bathtub could cost $200 to $800, and deeper soaking tubs could cost up to $12,000, Fixr reports. Labor costs may add $500 to $2,000. While refinishing your bathtub yourself saves the most money, even bringing in a professional typically costs less than replacing the tub.
Final Thoughts: Tub Refinishing
Refinishing a tub could give your bathtub the makeover it needs. Refinishing a bathtub with enough preparation and precaution is a relatively clear-cut DIY project. However, you could splurge on professional refinishing for a more polished look. Replacing your bathtub ultimately comes at a higher cost, but it may be the right call if your tub has significant damage or if you plan to remodel the bathroom.