If your heat is on full-blast and you could still use a second layer of wool socks, enlist the help of your trusty ceiling fan to help your home feel a little more comfortable.
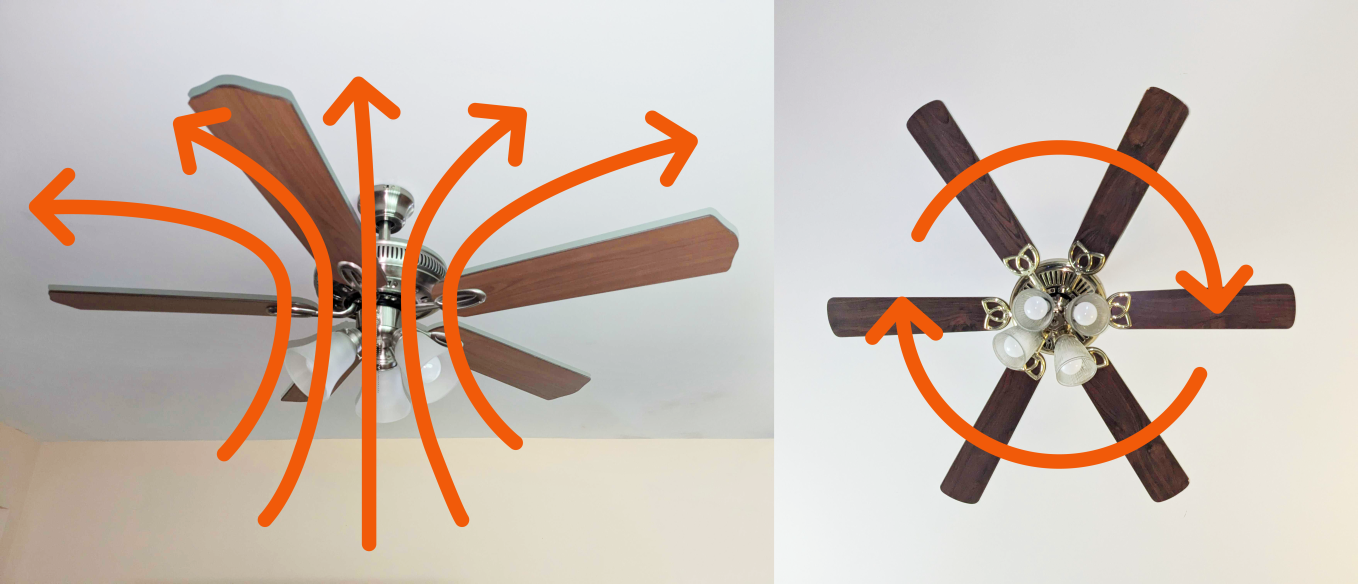
The trick to staying warm: Make sure your fan blades are rotating clockwise and at low speed (to avoid the wind chill factor). The clockwise motion helps push warm air that has risen to the top of your rooms, back down.
When summer rolls around, and your home is a tad stuffy, simply change the fan’s direction to counter-clockwise, then crank up the speed for breezy comfort. It’s as easy as that.
If you want to replace or install more ceiling fans, here are six helpful tips:
#1 Fans Work Best 8 Feet to 9 Feet Above the Floor
For greatest efficiency, place your fan:
- In the middle of your room
- Eight to nine feet above the floor (and for safety, no less than seven feet above the floor)
- So that the ends of the blades are no closer than 18 inches from walls
#2 Get a Longer Downrod if You Have Very Tall Ceilings
A standard downrod (the shaft that connects the motor to the blades) for an eight-foot ceiling is three to five inches long. You’ll need a six-inch downrod for nine-foot-high ceilings, and 60 inches for an 18-foot-high ceiling. Consult a showroom or manufacturer’s website to find the correct downrod length for your ceiling height.
#3 Choose a Flush-Mount Fan for Low Ceilings
For ceilings lower than eight feet, use a flush-mount fan designed with special vents to cool the motor. These fans have a depth of only six to nine inches. However, they generally don’t include a light fixture because of their short depth.
#4 Consider Installing a Speed Control Wall Switch
Many models feature a traditional pull-chain to control the power and speed. Or they're operated by a wall switch with a variable speed control. Switches range from simple knob types ($15) to dual fan-light dimmer switches ($19 to $35). Other models include remote control “clickers” that operate the fan from any point in the room.
#5 Hire an Electrician if You Need to Install a Connection
For a virgin ceiling, an electrician will have to bring electricity to that spot and install an electrical box, and a wall switch. Depending on the extent of this work and whether the electrician has to punch holes in your walls and ceiling to thread the wire, you might have to do some patching and painting. Expect to pay a licensed electrician for two to four hours of work at $160 to $535 per hour.
#6 Don’t Forget the Safety Bracket
For safety, your ceiling fan must be supported by a special bracket that’s firmly anchored to the joists. These brackets typically are sold separately from your fan for about $23.
Related: 5 Things That Really Will Put a Serious Dent in Your Energy Bills