Save money when you make these nifty DIY watering systems from materials you probably already have.
- Drip hoses that save water by delivering moisture directly to roots.
- Self-watering planter that hydrates plants by wicking moisture from a water well.
- Ollas, buried clay pots that deliver water to roots on demand.
DIY Drip Hose
A drip hose soaks soil — drop by drop — without wasting water to evaporation or promoting disease by soaking foliate. A 50-ft. drip hose costs $14 at big box stores. Or you can make one yourself from any old hose you might otherwise toss into the trash. Here’s how.
- Rescue an old hose. Clean it and lay it on a flat surface, such as a wood plank.
- On one side of the hose, punch tiny holes 1 to 2 inches apart, leaving 6 inches with no holes on both ends of the hose. To make holes, use an upholstery needle or a tiny, 1/64-inch drill bit.
- Attach a hose cap ($1.80 for ¾-in. brass) to one end of the hose. Attach the other end to another hose that's long enough to reach from a spigot to your garden.
- Turn on water so that drops fall from each hole along the hose. You want a drip -- not a spray -- so lower the pressure if too much water comes out.
- Wind the hose along the base of plants, then cover with 2 inches of mulch.
Self-Watering Earth Box Planter
An earth box is a self-watering planter that relies on the wicking ability of soil to continuously draw water from a built-in well. You fill the well through a tube — far less often than if you watered by hand.
An earth box can be any size or material, so long as it has a water reservoir and soil. Here’s a good one:
- Select a Rubbermaid Roughneck Tote (24-by-16-by-12 inches; $6). Using a super-sharp knife, cut out the flat part of the lid, separating it from the lip.
- Make “weeping cups” by punching 1/2-in. holes in two 16 oz. plastic cups until they look like Swiss cheese.
- Take a 5-ft. long piece of ½-inch-diameter ABS pipe ($6), mark it off every 2.5 inches, and cut into 16 pieces. Use the remainder (about 20 inches) for your watering tube.
- In the lid corners, cut out holes to fit two weeping cups and the watering tube.
- Using a ½-in. drill bit, punch holes in the lid spaced about 1 inch apart (that’s lots of holes!)
- Arrange the small PVC pieces in the bottom of the bin — they should be on-end and evenly spaced. Place the lid on top of the pieces. Place weeping cups and watering tube into their holes.
- Pack the weeping cups snugly with potting soil, then fill the box with soil.
- Drill a ½-in. drainage hole in the side of the box 2 ½ in. from the bottom.
- Fill the bin with water through the watering tube. When it’s full, water will come out the drainage hole.
- Plant.
Check out this video, which shows you how to make an earth box from two Rubbermaid tubs.
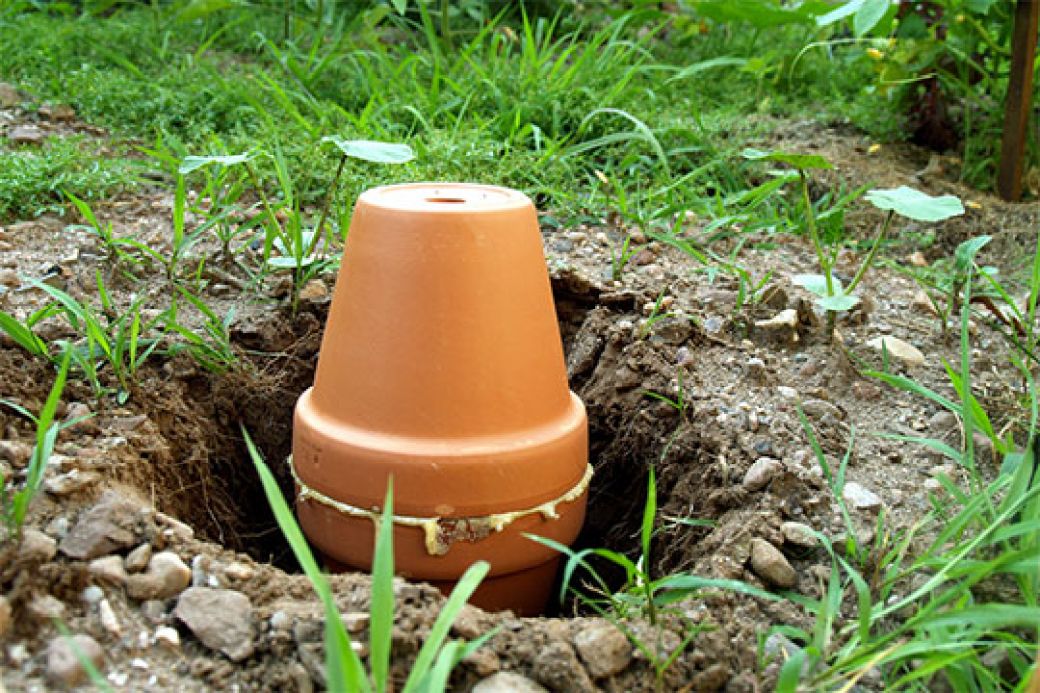
Make Your Own Ollas
Ollas (OY-yas) are earthen jars with thin necks and wide bellies that you fill with water and bury in your garden. Water seeps through the ollas’ unglazed walls to feed plant roots without wasting any water to evaporation or runoff. Eventually, plant roots grow around the ollas, drawing water when needed, creating a super-efficient self-watering system.
Make yours from extra clay garden pots and silicone caulk.
- Select two 8- or 10-in. clay pots with smooth rims that closely match each other.
- Caulk a bottle cap or piece of tile over the bottom hole of one pot to prevent water from pouring out.
- Cover the rim of one pot with a thick ribbon of silicone caulk. Place the other pot over the caulk and press lightly.
- Let caulk dry for 24 hours, then fill the pot with water to check for leaks.
- When you’re satisfied that your olla is leak-proof, bury it in your garden next to plants. Water in an 8-in. diameter; olla spreads 18 inches.
- Fill olla with water, and cover the hole with a rock or glazed saucer. Check water levels with a stick and refill as necessary.
Related: