Even the nicest homes have secret shames: a floor that never looks clean, a scratched and stained fridge, an AC unit that resembles a 1980s copy machine that didn't even look good when it was new.
If you could move them out of sight, you would. Except you can't. Instead, hide your home's ugliest spots right where they are. Here's some inspiration:
Exposed Laundry Room
Tanya, the writer behind "Dans le Lakehouse" DIY blog, has a laundry room that's more of a passageway than a destination. Not an ideal place to be tossing around your, um, unmentionables. So she found a way to hide the washer and dryer from passersby. Plus, "this was such an easy DIY project," she says.
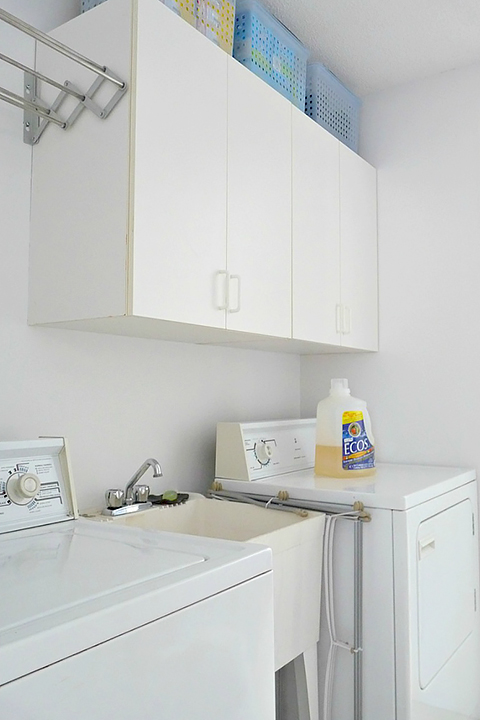

She bought upholstery-weight fabric (around $15/yard) and a curtain track ($30), which she says is "much nicer than a curtain rod." It took a couple of days to sew the curtain and only a few minutes to install the rod.
Instant hideaway!
Related: How to Organize Your Laundry Room
An Ugly Fridge
When the first thing you see as you enter your kitchen is a huge slab of ugly, you get motivated to find a solution.
Homeowner Mary Russell found a unique way to hide her dinged and stained fridge — and turn it into a colorful message board, too.
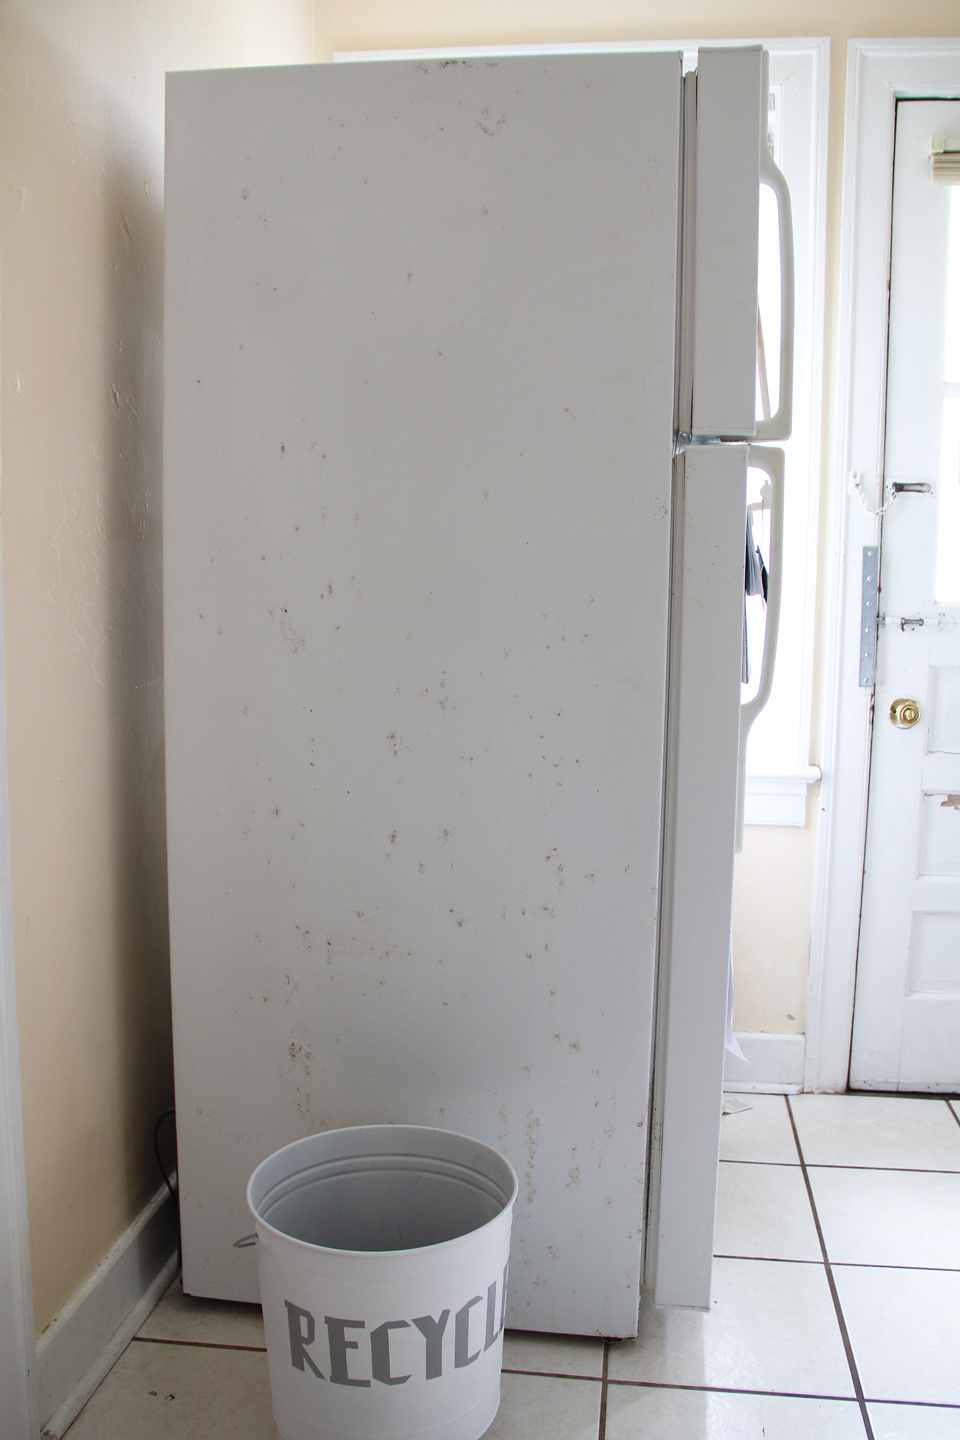
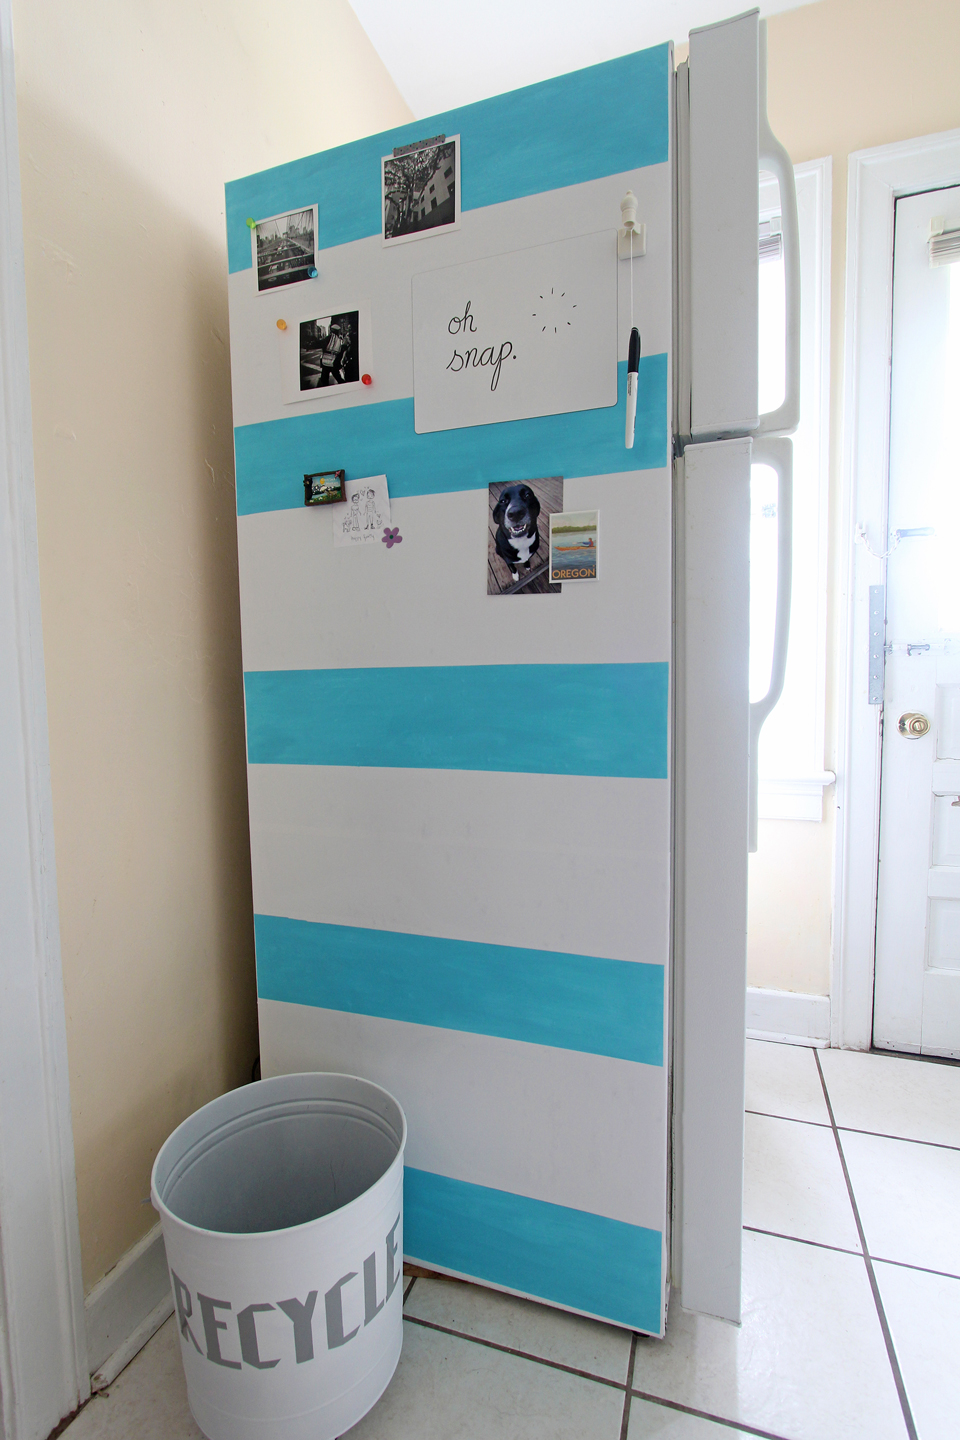
She stuck plain, white vinyl shelf liner (about $8) right over the ugly and then painted it in bold stripes. While the project isn't a time hog, she says it does require patience.
"The hardest and most time-consuming part of this whole project was getting the liner onto the fridge evenly." She says it took about 35 minutes of repositioning and adjusting. And, "since paint doesn't want to dry on plastic surfaces very quickly," she says you'll be waiting awhile before you can actually use it. Completely worth it, though, she says.
Outdated, Dingy Floors
On a whim, blogger, retired registered nurse, and mother of six, Linda Louie decided to redo her laundry room. "I spend a lot of time in there doing laundry for six kids, and that room was boring," she says.
She added cabinets above the washer and dryer and dressed the space up some, but the floor. The floor.
It was a wreck. Didn't fit her vision at all. She went online for ideas and saw a checkerboard pattern someone did on a wood floor. "Why not on vinyl?" she asked herself.
Why not?
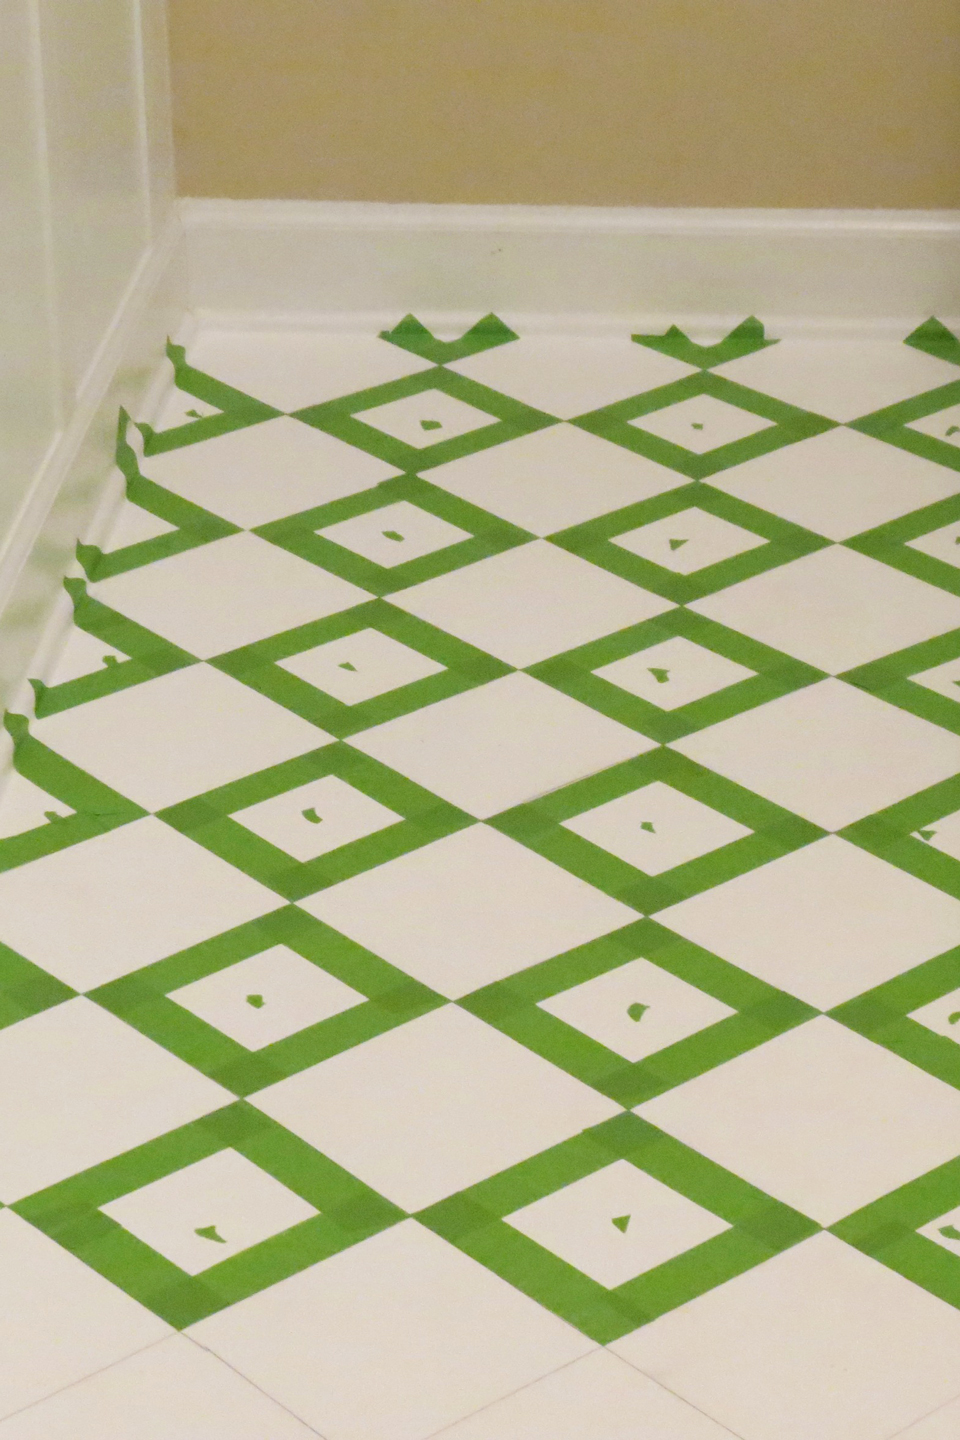
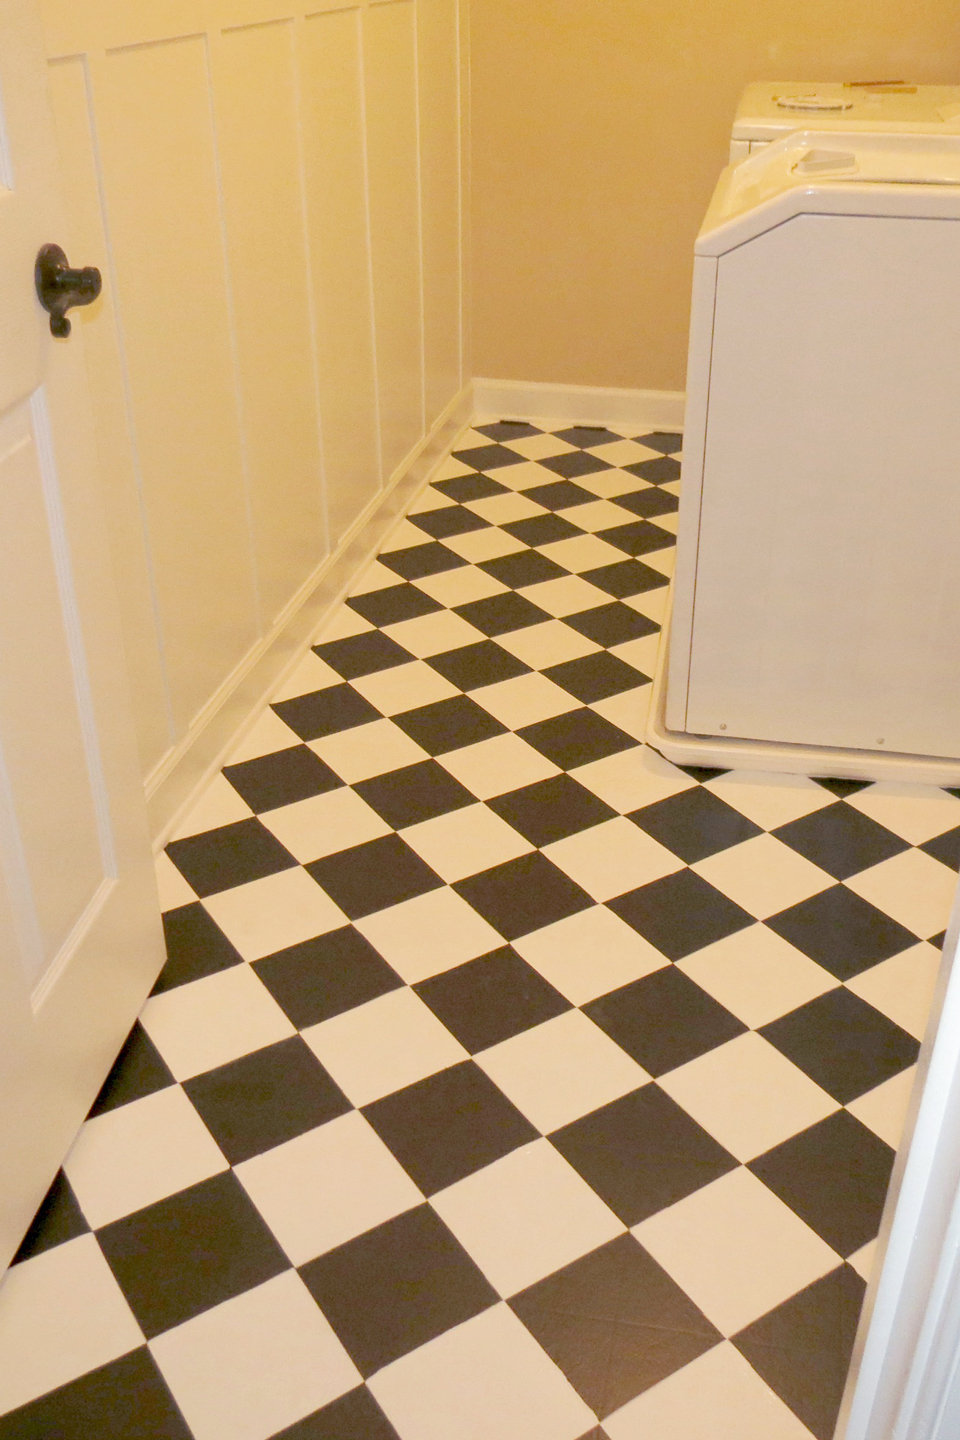
Louie sandpapered the vinyl so the paint would stick. Then she primed and painted it white using porch paint. Marking and taping the diamonds took a half day "but to my back, it felt like like 24," she joked. Then she painted in the black squares, and added three coats of polyurethane to protect her DIY efforts.
Not an eyesore anymore!
Related: 7 Things You Should Paint Instead of Replace to Save Money
The Utility Boxes in the Middle of Your Cozy Living Room
Why do builders seem to think things like circuit panels and thermostats are either a) invisible or b) a design element? Please. They're neither.
A true design element is needed to cover up the builder's lack of vision. Blogger Susan Forint says one of the most genius solutions she's seen came from a photographer friend of hers:
To cover a breaker box, he matted and framed one of his photos, then hung it on a 1-inch-thick wood cleat screwed to the wall for easy "lift off."
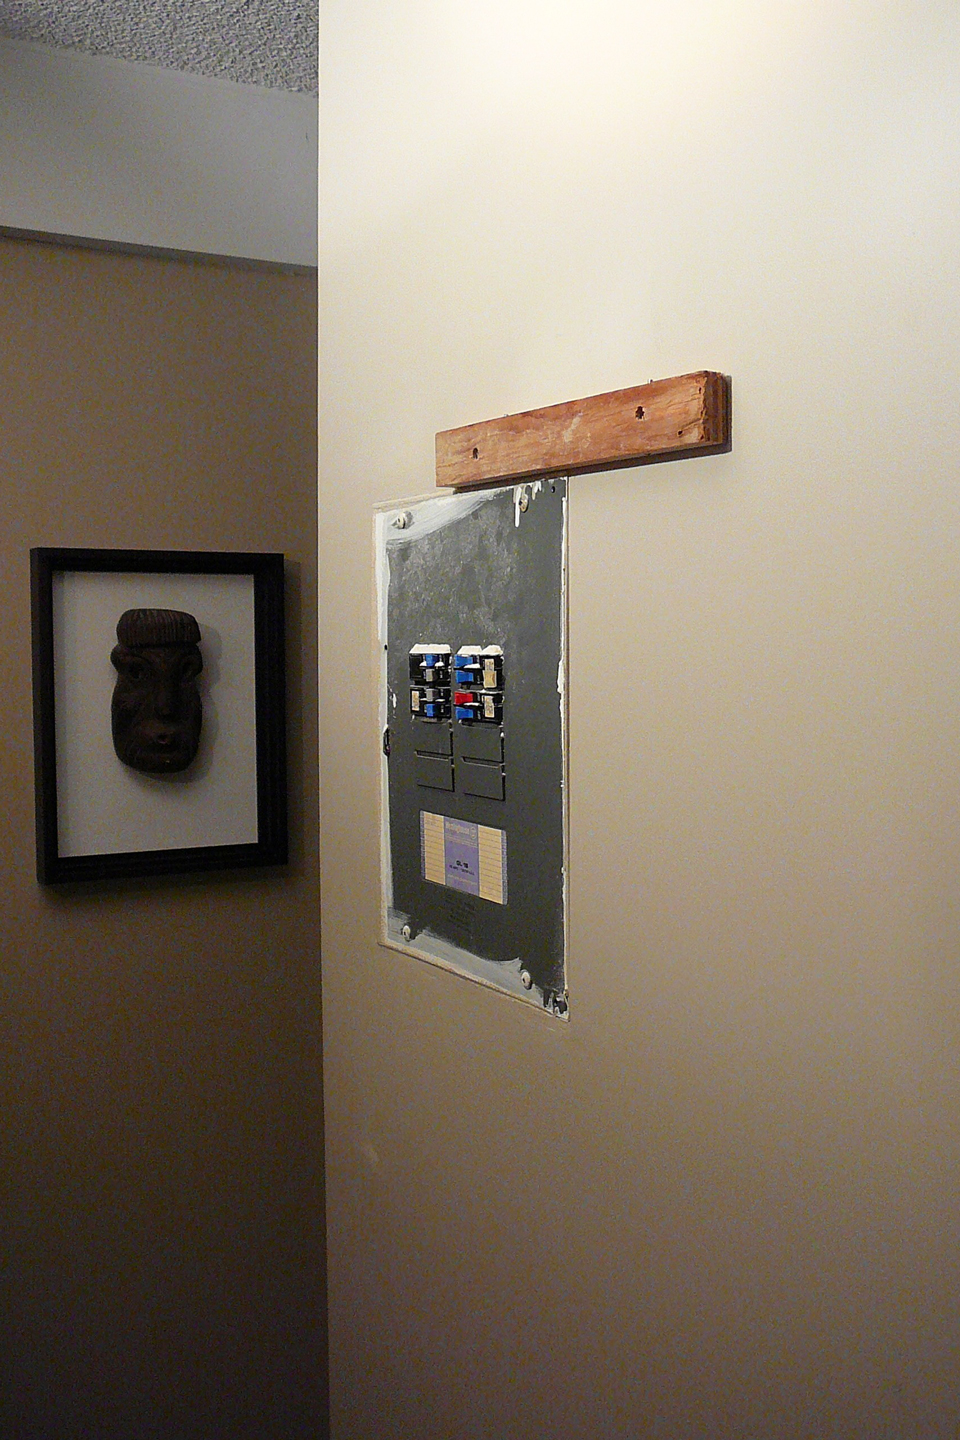
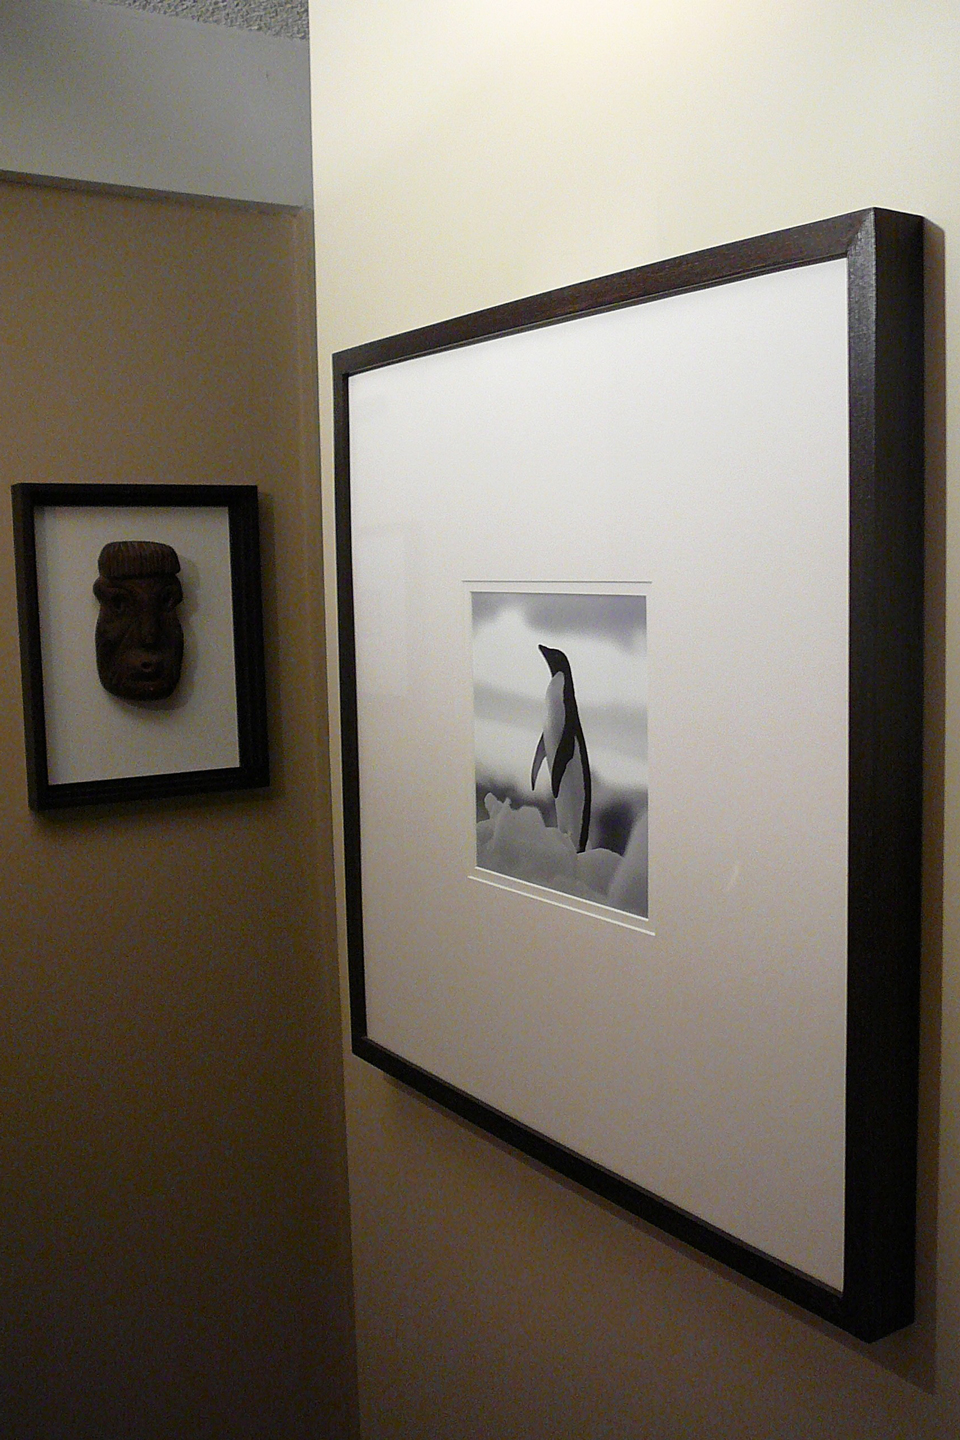
His next disguise was even more clever:
To hide a thermostat:
- Paint a white rectangle around the thermostat.
- Hang an open frame (with no glass) so the white looks like matting.
- Place a screw in the wall above the thermostat.
- Hang a decorative mask with enough cut out of the back to ensure air flow to the unit.
Brilliant! No need to look at that ugly stuff until you have to.
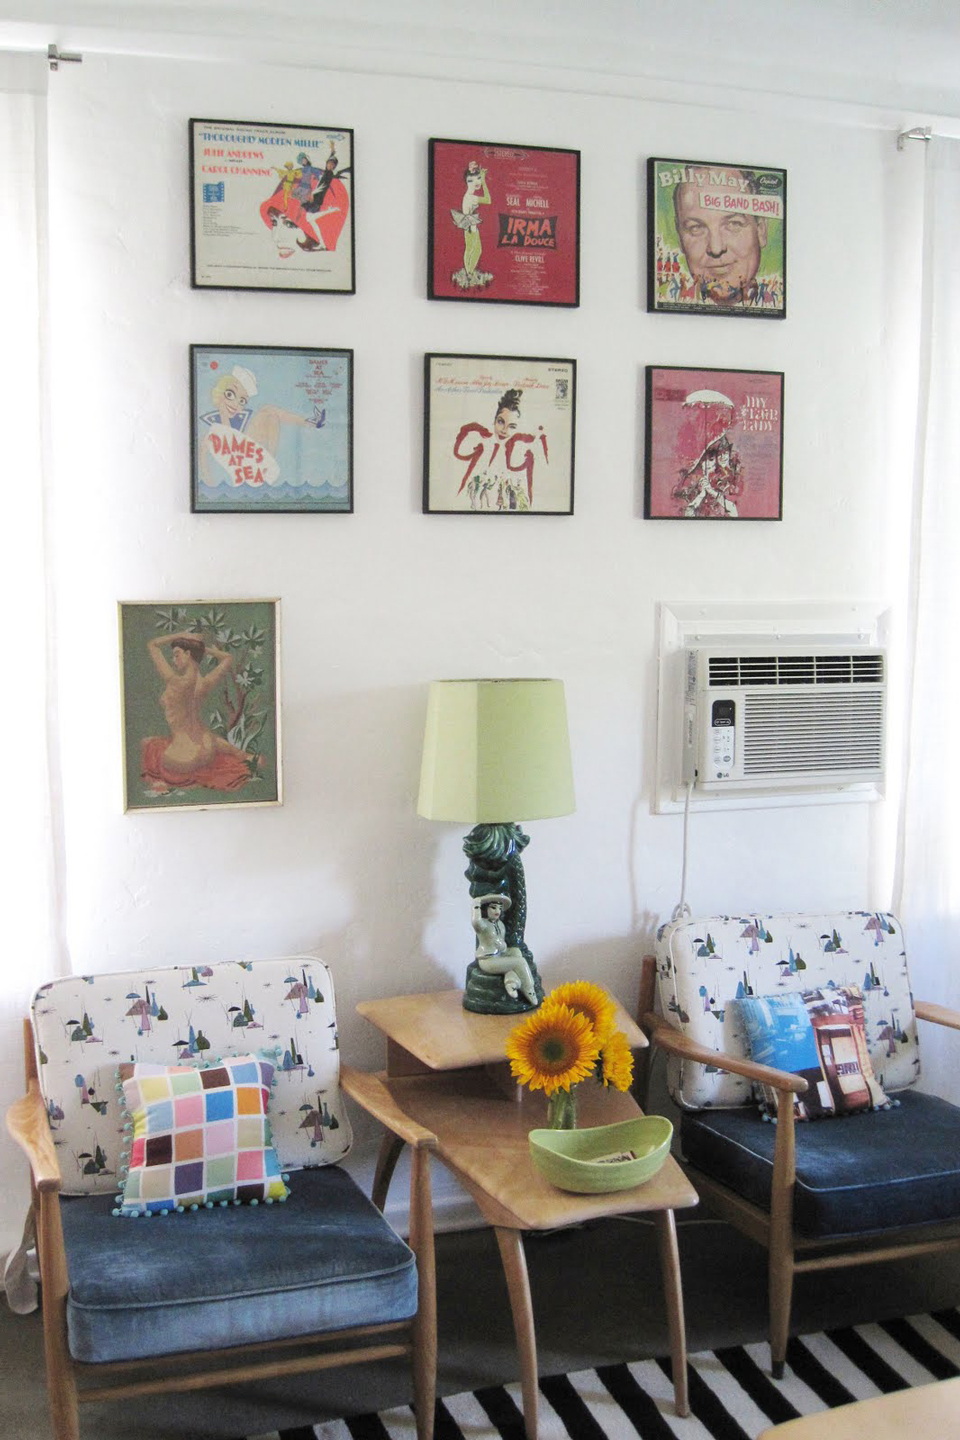
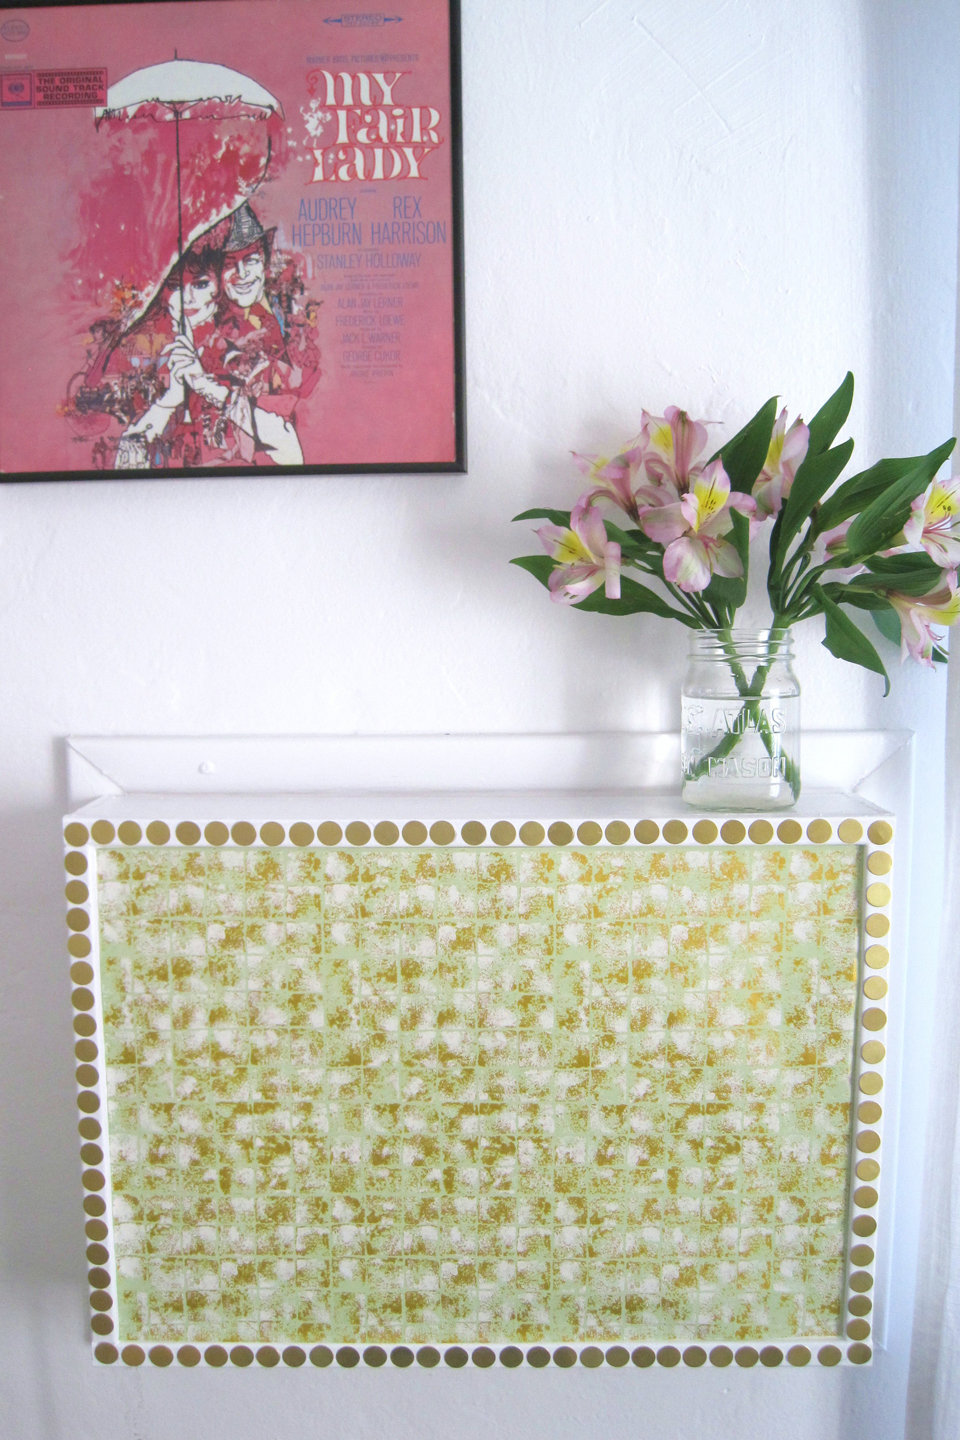
Clunky Air Conditioner Unit
The window AC unit in designer and blogger Holly Westhoff's condo wall was seriously cramping her chic nest style. With about an hour and $10 in materials, though, Westhoff was able to give the cold shoulder to that in-her-face unit.
She measured the unit, including the "ugly strips attaching it to the wall," she says. She bought cheap wood and molding, and had them cut to size at the store. She grabbed wood glue; hammer and nails; spray paint; thin brass disks punched out from a sheet (leftovers from a previous project); decorative paper; and a glue gun.
Then, she set to work:
She created a frame on the wall with the molding. She built a box to hang on that frame. She glued together the pieces of wood — top, front and sides, no bottom — then nailed them together for extra sturdiness. She glued molding strips on top of the edges of the flat panel to give it a finished look, then spray painted it white. She glued brass discs to the molding, cut her decorative wrapping paper to fit, and glued it to the front panel.
Now you'd never know it was there (underneath that vase)— until it's time to crank the cool air.
Related: Best Money-Saving DIY Projects